
Today’s blog we are looking at examples of what I was able to do with sending the index cards through my HP printer for creating my “From the Kitchen of Aunt Helen” header for creating my own custom recipe cards.
To simply explain here is a recap. This approach will probably appeal more to the person who does NOT measure exactly and is more like ‘in the neighborhood’. The instructions are meant to be flexible and work with you.
First take a 8 1/2 ” x 11 ” sheet of printer paper and using your ruler mark off one inch rows.
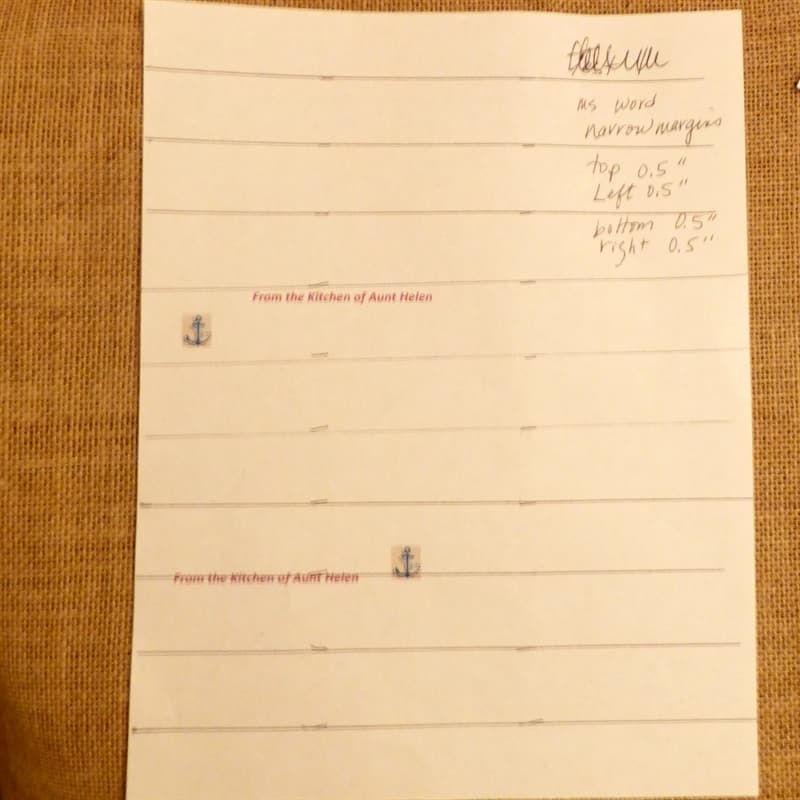
Then in Microsoft Word (or something similar) you will set your margins to narrow. Top 0.5″, Left 0.5″, bottom 0.5″, and right 0.5″.
You are then in Word going to on the first row enter your header – in my example From the Kitchen of Aunt Helen which I put into bold italics, and chose a color for the font, and inserted my anchor clip art that is used with my blog.
Then take your index cards – in this example I used the 3″ x 5″ and aligned the red line at the top of the index card with the first inch line row marking on the sheet of paper behind it. Using some good tape I taped on the left and on the right lightly to hold the card in place.
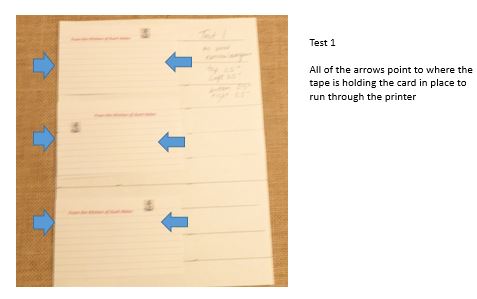 Repeat for placing all three index cards. I am able to run three cards through on one page.
Then lay the paper – for my printer – I lay the paper in upside down onto the tray so it will go through the printer correctly when it prints.
Select print. It will come out printed!
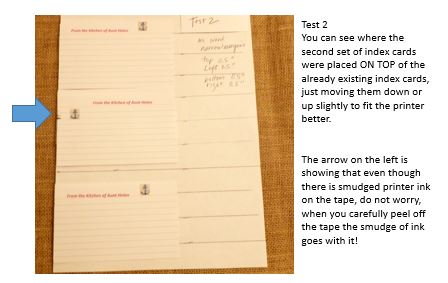 You can then play around with moving the card up or down and re-affixing it, adjusting the margins in MS Word to name a few ways.
One thing you can do is before you actually affix the index cards down you can run the sheet of “lined” paper through the printer and it will print directly onto the sheet and that will give you an indication of how much to move the placement of your card onto it.
One could use grid paper to affix your index cards to run through the printer or you could measure a lot more. My point here is that with a little bit of flexibility you did not end up with glazed eyes reading a PhD level of instructions and never start the project. From running through two tests of cards, I ended up with three that I like and will use.
There you have it. I hope that you are inspired to see how easy this is and to not be afraid of using your computer and printer as a tool for you using what you already have on hand. You can do this even if it is the middle of the night and you are awake, or waiting for it to be quiet for yourself to do a small project like this one. You already have the printer ink and the index cards package of 100 was 50 cents! The intent remains to write down your top five recipes to share and send out in a real snail mail letter!
Tomorrow I will show some items that are more of the ‘store bought’ variety for some examples.
![]() Anchors Aweigh,
Anchors Aweigh,
Helen